Sinlair QL restoration
Someone out there may say I’ve got some fetish for Sinclair hardware by now, ehehe. I swear this is my last post about Sinclair (for now, none knows about the future).
Where to begin with…?
Before having my hands on this hardware I didn’t even know it actually existed somewhere in time, precisily in 1984. It came to me with tons of its cassettes, but with no cabling, nor PSU. So, I had to scout my way through on this one.
The missing PSU
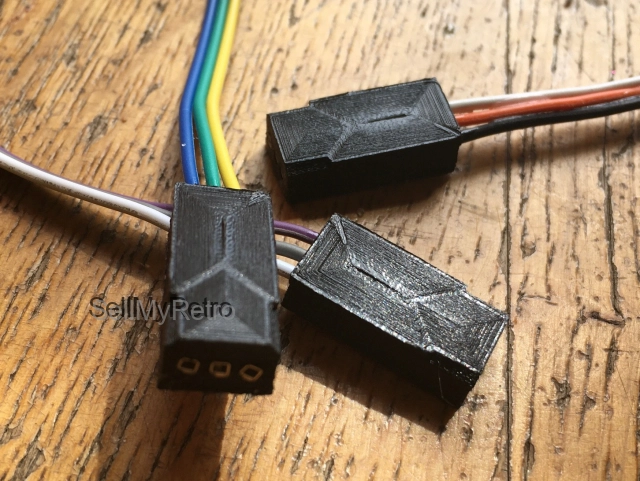
The breaking change with prior Sinclair hardware began with the PSU itself. The connector is a custom 3 pin connector I’ve never seen before. So much for ad-hoc hardware (image courtesy of SellMyRetro [0]).
Furthermore, I then discovered it was designed to output a 9VDC rectified, with GND in the middle, and 15.6VAC tension on the other pin, straight outta from a custom tailored transformer secondary winding.
I figured it would have been challenging making this work out again. Actually, I still lacked any way to test it to begin with.
In my early days (read, when I was still an university student) I would have picked up the challenge by following the very well made video for reproducing the PSU itself [1] , but today I have other priorities, and no time for this.
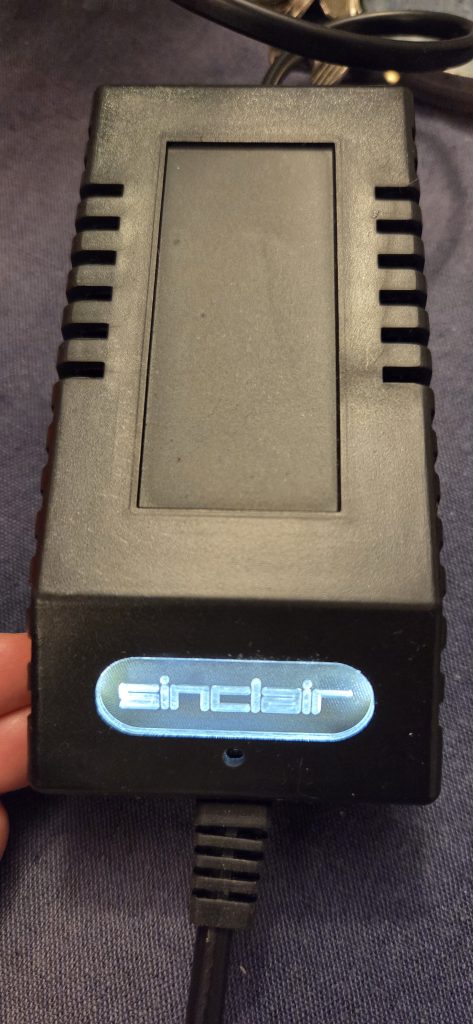
So, I just went out and bought one from the market. I especially recommend the site keelog.com for this [2]. EU shipped from Poland, very well packed, and manufactured.
So, now I had my brand new PSU to begin with.
Let’s crack this open now
By opening the computer it appeared pretty well maintained given the (abandoning) years – still, confirmed abandoned in a box in the basement since the late 80s, and survived 2 relocations. Other than the (too many) screws to open it, it also had several wirings here and there which were of unknown use to me. So I gave it a shot to avoid mis-handling the color ordering at a later stage.
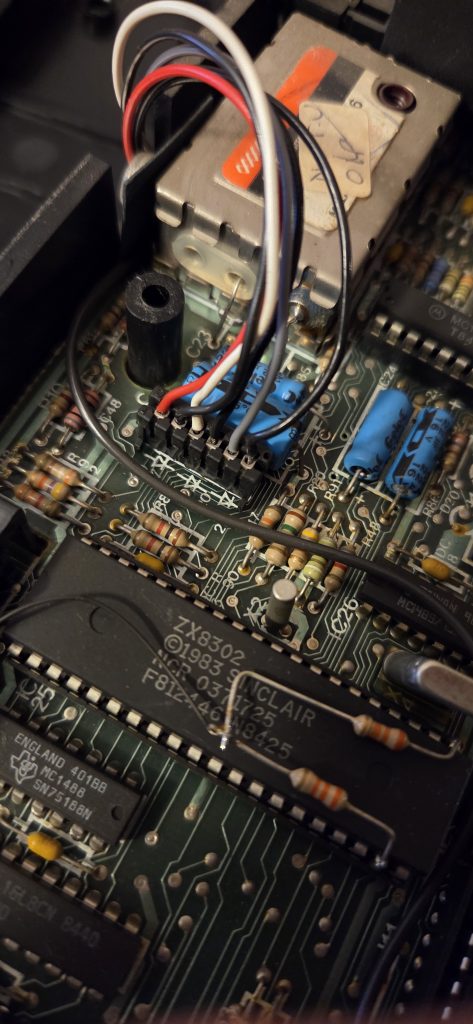
Usual buck converter over 7805, and recap
I figured I would have promptly recapped it, and moved to the usual buck converter. This one was actually easy, and I didn’t even need to insulate with heat sink, as the existing spacing for supporting the original heatsink came in handy, and was a perfect fit for the job.
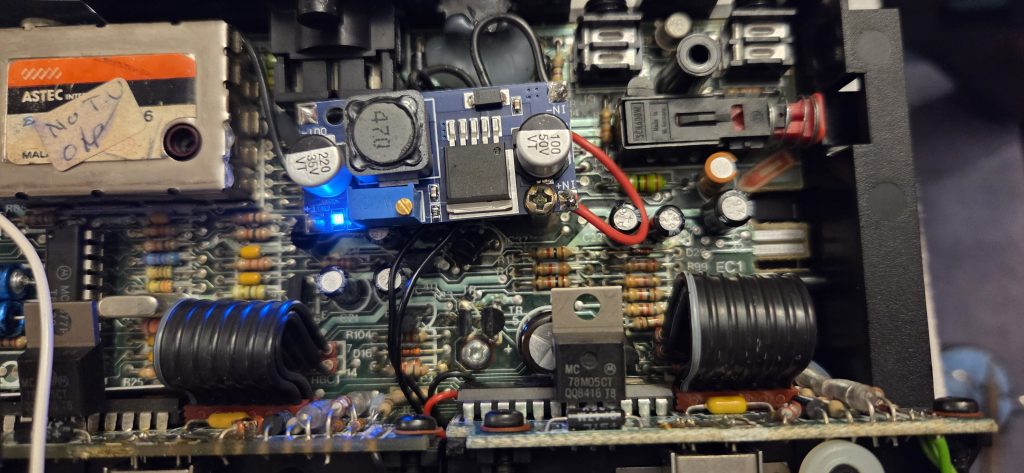
The recapping was done by using the remainings of the previous order from the Sinclair Spectrum restoration post:
So, by now I should have a working QL. Right?
First try, it works!
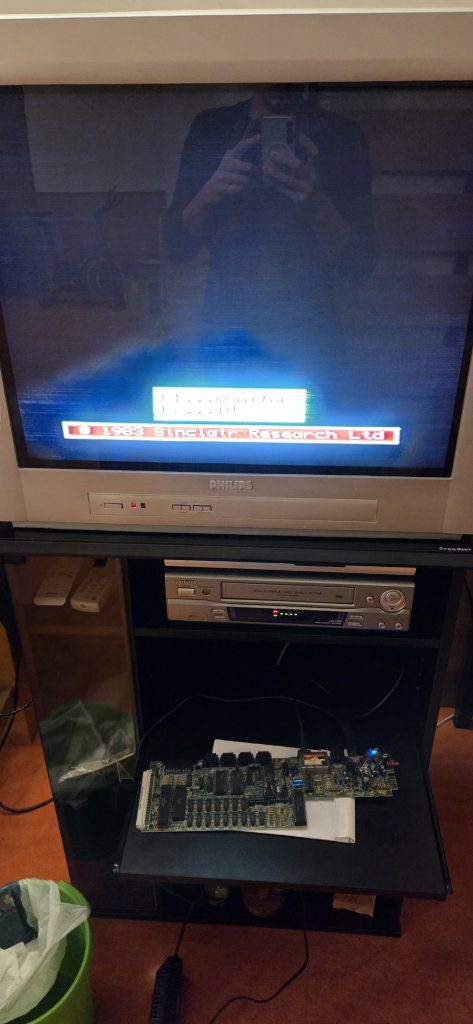
Yes, the bin was there as a backup plan 😀
Up to the next one – the keyboard
Of course, the keyboard wouldn’t just work. Figure. Sinclair was so cheap with these plastics. I had no choice but to go for a replacement [3].
What else…? Oxides…
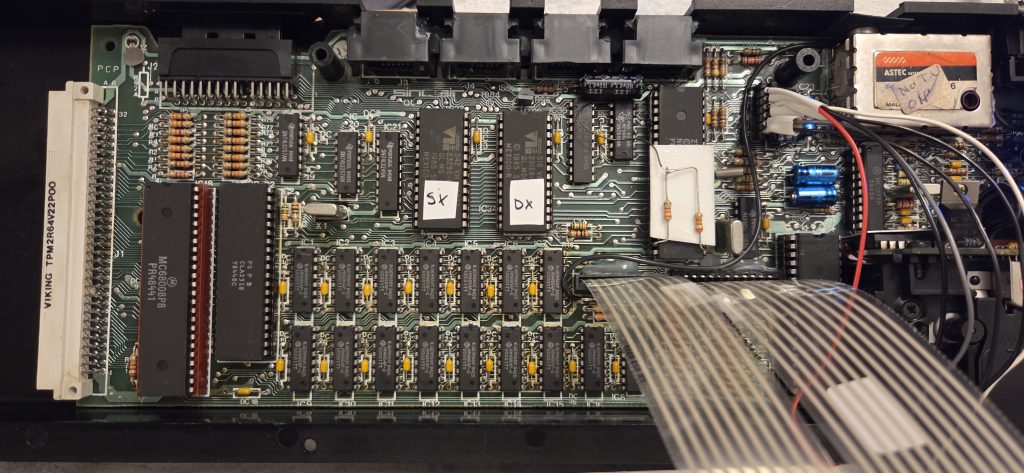
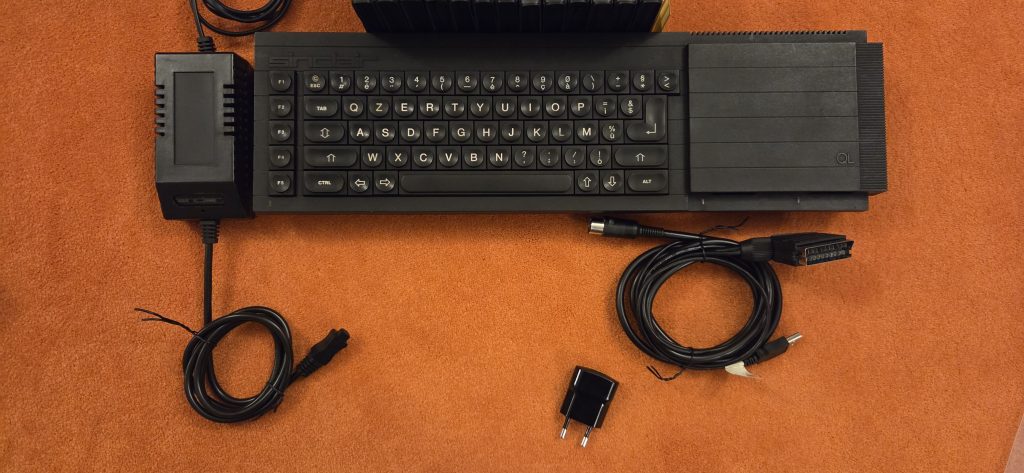
I don’t have photos of this, I’m sorry, but all of the IC sockets, surprisingly, were perfect from above. Although, after removing the ICs, all of them appeared to be black and oxidized. Nothing much but a handy job with contact cleaner, and a tooth brush just did it. Here’s a picture of the recapping job, new keyboard installed, and all done already.
Tips
HINT: I didn’t quite like that factory modification of those resistors on top of the IC, so I put some double sided tape underneath it. Also, if you zoom over the connectors, you’ll notice I’ve put some hot glue to make the connectors more stable to mechanical stress.
Additional note on the 2nd cassette drive
The second cassette tape driver was having a minor issue with the motor, which kept running as soon as the QL would have been turned on. I don’t recollect much exactly this was solved, but it was not the drive’s ULA – which is the major culprit typically.iirc, after cleaning up all the oxides from the ICs sockets, the problem disappeared.
Up to the next one – video, RGB at last?
By looking at the QL it was pretty obvious it came with a standard DIN8 connector to output video. So, I did my homework to understand how to actually make use of it, instead of relying to RF, or eventually do a composite mod – which I’m not even sure is available, although, I’m pretty sure there is the possibility.
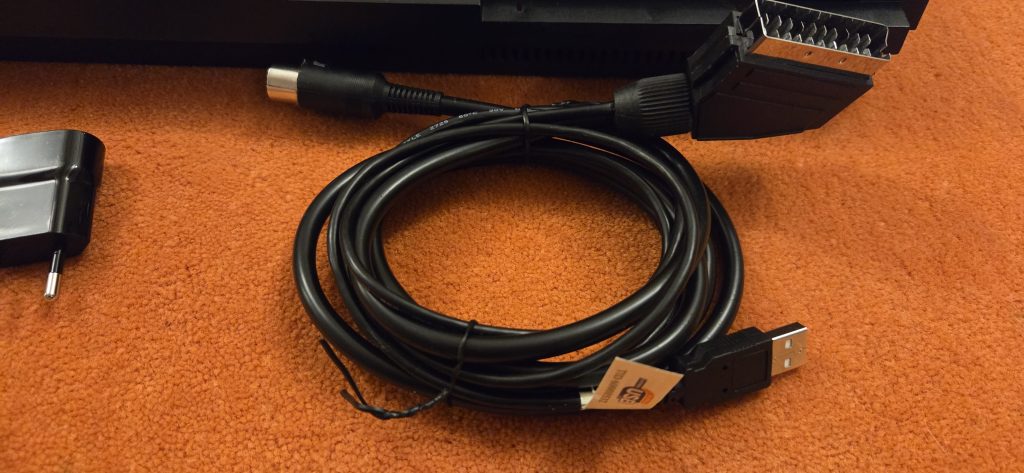
I didn’t have any standard DIN8 connector at hand, unfortunately, so I just bought one. I was pretty unhappy with what I got, so I won’t put a bad adv to the eBay seller I bought it from here. The cable had several flaws, as it was not shielded, and also soldered badly in grounding at connector side. As a result, the video was shacky on the TV. Luckily enough, the cable had 21 wires, so I could manage to resolder it completely the right way – say, avoid ground loops by soldering all the single grounding wires at the GND pin on the connector (not the connector’s RF shielding). I typically ground pins 4, 5, 9, 10, 12, 13, 14, 17, 18, 21 at SCART side. As the QL doesn’t have audio capabilities, also pins 2, and 6 were grounded. Then, off we go with RGB.
This little beast needs some resistors to adapt impedence, of value 390 Ohms, on R, G, B, and SYNC lines. I’ve soldered them in the DIN8 connector itself, as later I would have hot glued the inside. HINT: I always do this on any cables I build, so it will have additional mechanical resistance to traction/pull, avoiding breakups in the long term. No photo for this job, sorry.
The thing that made me uncomfortable though was the lack of a native 5V voltage present at DIN side to trick auto-AV mode on the TV. I’ve tested many schematics available on the web, like this one, but none of them worked.
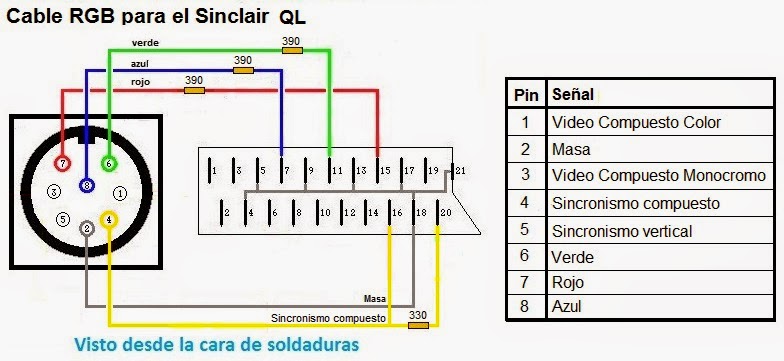
The Sinclair QL provided various signals to be used for both TVs and Monitors back in 1984, but the soon-to-be-de-facto standard SCART (at least for Europe) was not Sinclair’s first priority it seems. The schematic above was promising, by using C-SYNC TTL 5V voltage to drive the RGB Blanking / Fast Switching #16 SCART pin. But, it didn’t work.
So, in the end, I’ve applied an USB cable to provide an external 5V voltage, and put my usual 180 Ohm across pins #8 and #16 on the SCART. Here’s the result.
Conclusion
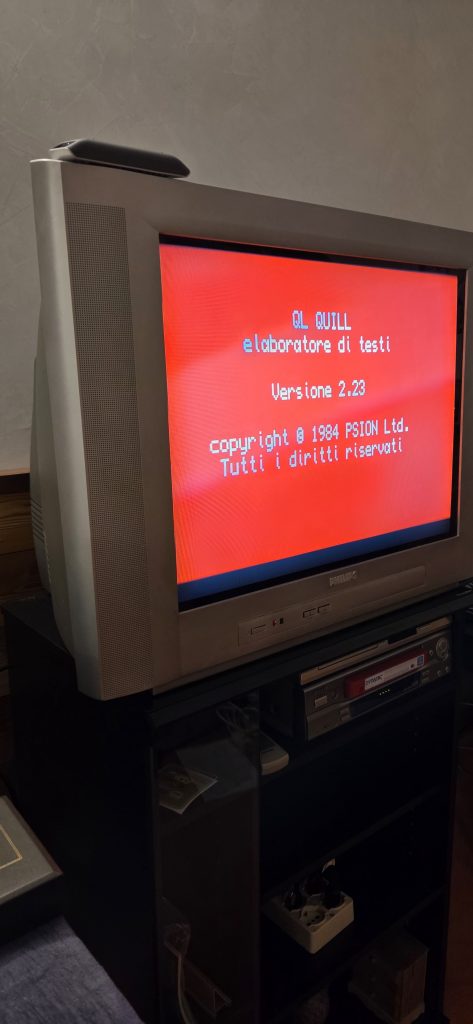
It flawlessly worked then 🙂

Better fix those connectors as well
I’ve also used some hot glue to let the connectors be having more
Links
[0] https://www.sellmyretro.com/offer/details/sinclair-ql-power-plugs-44409?lang=en_GB
[1] https://www.youtube.com/watch?v=3wtGBzwp4DY
[2] https://www.keelog.com/sinclair-ql-psu-modern-gray-eu-replacement-sinclair-ql-power-supply-eu-plug/
[3] https://www.sintech-shop.de/en/ql-membrane/a-6036